“My iPad is disabled and won’t connect to iTunes. How to fix it?”
Your iPad carries a lot of important information and therefore should have a high level of protection that is not just secure but only accessible to you. This is why you should take steps to protect the device using a passcode. But it is very common to forget the passcode of your iPad and when you enter the wrong ones too many times, you may see the error message, “iPad is Disabled. Connect to iTunes” appear on the screen.
This situation can be quite frustrating because you are unable to access the iPad to remove it from the Settings. The problem can be further compounded if you are unable to connect the iPad to iTunes or iTunes fail to recognize the device. If this is what you are experiencing, this article will prove very useful to you. Here we will explain why your iPad is disabled and show you some fixes to resolve this issue. Let’s get started.
Part 1. Why iPad is Disabled Connect to iTunes?
Before we get to the solutions you can try to fix this problem, it is important to understand the reason why the iPad is disabled and won’t connect to iTunes. The reasons are varied and may include the following;
Too Many Passcode Attempts
This is the most common cause of this error message on iPad. You can forget your passcode and enter the wrong one into the device more than once. It is also possible that your child may have entered the wrong passcode into the device several times while playing with the iPad, eventually causing this error.
When Connecting to iTunes
This error has also been known to appear as soon as you connect the iPad to iTunes. When this happens, it can be frustrating because you actually expect iTunes to fix the issue and not cause it.
Regardless of the reason why you may be seeing this error on your iPad, the following solutions should be able to help.
Part 2. Fix Disabled iPad without iTunes/iCloud
This solution is ideal when your iPad is disabled and you are unable to connect it to iTunes or if it is iTunes that caused the problem in the first place. In this case, you need a third-party tool that is designed to unlock disabled iOS devices. The best is MobePas iPhone Passcode Unlocker since it can help you unlock a disabled iPad without having to use iTunes or even when you don’t know the right passcode. The following are some of the program’s most notable features:
- It is very easy to use and will work even if you enter the wrong passcode numerous times and the iPad gets disabled, or the screen is broken and you can’t enter the passcode.
- It is useful for a number of other situations such as removing screen locks like 4-digit/6-digit passcode, Touch ID, or Face ID from iPhone or iPad.
- You can also use it to remove Apple ID and iCloud account even if Find My iPhone is enabled on the device without access to the password.
- You can very easily and quickly remove the Screen Time or Restrictions passcode on iPhone/iPad without any data loss.
- It is compatible with all iPhone models and all versions of the iOS firmware including iPhone 13/12 and iOS 15/14.
Here’s how to fix and unlock disabled iPad without iTunes or iCloud:
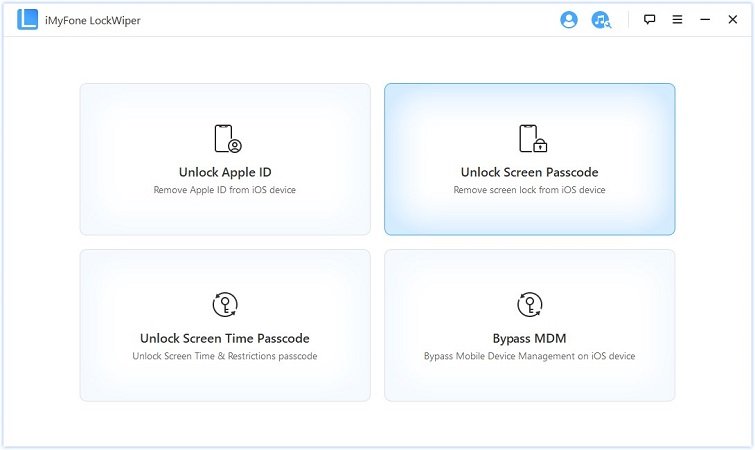
Step 1: Download the iPhone Unlocker software to your computer and get it installed. Run it and in the primary window, click on “Unlock Screen Passcode” to begin.

Step 2: Click on “Start” and connect the iPad to the computer using a USB cable. Click “Next” and the program will display information about the device.

Please note that if the program fails to detect the iPad, you may have to follow the on-screen instructions to put it into recovery/DFU mode.

Step 3: Once the device has been detected, click on “Download” to download and extract the necessary firmware for your disabled iPad.

Step 4: Click on “Start Unlock” as soon as the firmware download is complete and read the text in the next window. Enter the “000000” code into the box provided and the program will immediately begin unlocking the device.

Keep the device connected to the computer until the process is complete. The program will notify you the unlock is done and you can then access the iPad and change the passcode to something you can easily remember.
Part 3. Fix Disabled iPad Using iTunes Backup
This solution will only work if you have synced the iPad with iTunes before and iTunes is able to detect the device. Also, you should have to Find My iPad disabled under the Settings app. Here’s how to do it:
- Connect the iPad to your computer and launch iTunes if it doesn’t automatically open.
- Click on the iPad device icon in the upper-right corner when it appears.
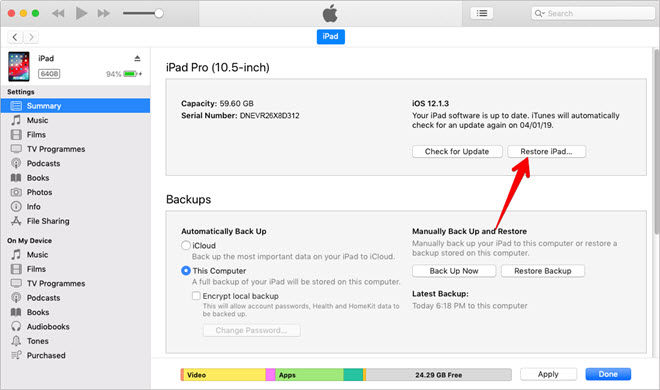
- Click on “Summary” on the left and ensure that “This Computer” is selected. Then click on “Back up Now” to begin the backup process.
- Once the backup process is finished, click on “Restore iPad” in the summary tab.
- After that, set up the iPad as a new device and select “Restore from iTunes backup” to restore the backup you just created.

Part 4. Fix Disabled iPad Using Recovery Mode
If you have never synced the iPad in iTunes or iTunes doesn’t recognize the device, you may have to put the device in recovery mode before restoring it in iTunes. Keep in mind that all the data on the device will be deleted. Here’s how to do that:
Step 1: Open iTunes and connect your iPad to the computer via USB cable.
Step 2: Put the iPad in the recovery mode using the following procedures:
- For iPads with Face ID: Press and hold the power and volume down button until the power off slider appears. Slide to turn off the device and then hold the power button until you see the recovery mode screen.
- For iPads with a home button: Press and hold the power button until the slider appears. Drag it to turn off the device and then hold the home button until you see the recovery mode screen.
Step 3: iTunes will automatically detect your iPad in recovery mode and display a popup. Choose the “Restore” option and wait for the process to be completed.

Part 5. Fix Disabled iPad Using iCloud
This method will be helpful to you if you had enabled “Find My iPad” before the iPad was disabled. Please note that your iPad should be connected to a stable internet connection. To restore disabled iPad using iCloud, follow these simple steps:
- Go to iCloud.com and log in using your Apple ID and password (the Apple ID and password must be the ones you use on your disabled iPad).
- Click on “Find iPhone” and then select “All Devices”. You should see all the devices that use the same Apple ID listed here. Click on the iPad you want to unlock.
- You will see a map showing the current location of the iPad and a number of options on the left. Click on “Erase iPad” and confirm the action by clicking on “Erase” again.
- You will also be required to enter our Apple ID credentials again to continue.
- Answer the security questions that appear in the next window if you had used the two-factor authentication feature and enter an alternative phone number that can be used to recover the account. Click “Next”
- Click “Done” and all the data and settings on the device along with its passcode will be erased, allowing you to set up a new passcode.


