
“My iPhone 13 Pro Max won’t connect to Wi-Fi but other devices will. All of a sudden it loses internet connection via Wi-Fi, it shows Wi-Fi signals on my phone but no internet. My other devices connected to the same network work fine during that time. What should I do now? Please help!”
Your iPhone or iPad won’t connect to Wi-Fi and you don’t know what to do? It is really frustrating since updating the iOS, streaming videos and music, downloading large files, etc. are all best done over a Wi-Fi connection. Don’t worry. In this article, we’ll explain why your iPhone or iPad is not connecting to Wi-Fi and show you how to fix the problem with ease.
Turn Wi-Fi Off And Back On
Minor software glitch is a common reason why iPhone won’t connect to a Wi-Fi network. You can simply turn Wi-Fi off and then back on to fix the problem. This gives your iPhone a fresh start and a second chance to make a clean connection to Wi-Fi.
- On your iPhone, swipe from the bottom edge of the screen and open the Control Center.
- Tap on the Wi-Fi icon to turn it Off. Wait for several seconds and tap the icon again to turn the Wi-Fi back on.
![[Fix] 12 Ways to Fix iPhone/iPad Won’t Connect to Wi-Fi](https://www.mobepas.com/images/20210721_60f792052f24a.png)
Disable Airplane Mode
If your iPhone is in Airplane Mode, the device won’t connect to the network. This could be the cause of your problem. Just open the Control Center on your iPhone and turn the Airplane Mode off, the problem will be solved. Then you can try to connect to a Wi-Fi network again and see if it works.
Disable Wi-Fi Assist
Wi-Fi Assist helps to ensure a stable internet connection on your iPhone. If your Wi-Fi connection is poor or slow, Wi-Fi Assist will automatically switch to cellular. When your iPhone is not connecting to a Wi-Fi network, you can disable the Wi-Fi Assist feature to fix the issue.
- On your iPhone, go to Settings > Cellular.
- Scroll down to find “Wi-Fi Assist” and turn the feature on, then turn it back off.
![[Fix] 12 Ways to Fix iPhone/iPad Won’t Connect to Wi-Fi](https://www.mobepas.com/images/20210721_60f792056a9aa.png)
Restart Your iPhone or iPad
If the above methods didn’t work, try restarting your iPhone or iPad. A restart can be a very effective solution if your iPhone or iPad can’t connect to a Wi-Fi network.
- On your iPhone, press and hold the Power button until “slide to power off” appears.
- Swipe the power icon left-to-right to turn your iPhone off.
- Wait a few seconds, then press and hold the Power button again to turn the device back on.
![[Fix] 12 Ways to Fix iPhone/iPad Won’t Connect to Wi-Fi](https://www.mobepas.com/images/20210721_60f79205b2a1b.jpg)
Restart Your Wireless Router
While you’re restarting your iPhone, we recommend you to turn your router off then back on as well. When your iPhone is unable to connect to Wi-Fi, sometimes your router is to blame. To restart your Wi-Fi router, simply pull the power cord out of the wall and plug it back in.
Forget Wi-Fi Network
When you connect your iPhone to a new Wi-Fi network for the first time, it saves data about the network and how to connect to it. If you changed the password or other settings, forgetting the network will give it a fresh start.
- On your iPhone, go to Settings > Wi-Fi and tap the blue “i” button next to the name of your Wi-Fi network.
- Then tap “Forget This Network”. Once you forget the network, go back to Settings > Wi-Fi and select the network again.
- Now enter your Wi-Fi password and see if your iPhone will connect to Wi-Fi.
![[Fix] 12 Ways to Fix iPhone/iPad Won’t Connect to Wi-Fi](https://www.mobepas.com/images/20210721_60f79206cbfb8.png)
Turn Off Location Services
Usually, iPhone uses the Wi-Fi networks near you to improve the accuracy of mapping and location services. It can be a cause of your iPhone not connecting to a Wi-Fi network. You can turn off this setting to solve the problem.
- On your iPhone, go to Settings > Privacy and tap “Location Services”.
- Swipe to the bottom and tap “System Services”.
- Move the “Wi-Fi Networking ” slider to the white/off position.
![[Fix] 12 Ways to Fix iPhone/iPad Won’t Connect to Wi-Fi](https://www.mobepas.com/images/20210721_60f79207e7593.png)
Update Router Firmware
Sometimes, there was a problem with your wireless router’s built-in firmware. The router may still broadcast the Wi-Fi network, but the built-in firmware doesn’t respond when a device tries to connect. You can go to the manufacturer’s official website and see if the firmware is available for your router. Download and update the firmware to prevent the problem from coming back.
Reset Network Settings
Another troubleshooting step when your iPhone can’t connect to Wi-Fi is to reset its network settings. This will restore all of your iPhone’s Wi-Fi, Bluetooth, Cellular, and VPN settings to factory defaults. After resetting the network settings, you’ll have to reenter your Wi-Fi password.
- On your iPhone, go to Settings > General > Reset and tap “Reset Network Settings”.
- Enter your iPhone passcode and then tap “Reset Network Settings” to confirm.
- Your iPhone will turn off and perform the reset, then turn back on.
![[Fix] 12 Ways to Fix iPhone/iPad Won’t Connect to Wi-Fi](https://www.mobepas.com/images/20210721_60f79208d3f0c.jpg)
Update to Latest Version of iOS
A software bug can cause many issues, including iPhone won’t connect to Wi-Fi problem. Apple regularly releases updates to the iOS to help solve issues. If your iPhone has trouble connecting to Wi-Fi, you can check to see if an iOS update is available for your device. If there is, installing it may fix the problem. Since you can’t update the software wirelessly, you can do it using iTunes.
Restore iPhone to Factory Settings
If your iPhone is still unable to connect to a Wi-Fi network, you can try restoring your iPhone to its factory settings. This deletes everything from the iPhone and returns it to its out-of-box pristine condition. Before doing this, please make a complete backup of your iPhone.
- On your iPhone, go to Settings > General and tap “Reset”.
- Tap “Erase All Content and Settings”. Enter your iPhone passcode to confirm and proceed with the reset.
- When the reset is complete, you’ll have a fresh iPhone. You can either set it up as a new device or restore it from your backup.
![[Fix] 12 Ways to Fix iPhone/iPad Won’t Connect to Wi-Fi](https://www.mobepas.com/images/20210721_60f792091c3fe.jpg)
Fix iPhone Not Connecting to Wi-Fi without Data Loss
The last step to fix this issue is using the third-party tool – MobePas iOS System Recovery. This iOS repair tool can efficiently help to fix all the iOS issues, including iPhone not connecting to Wi-Fi network, iPhone stuck on Apple logo, Recovery mode, DFU mode, black/white screen of death, iPhone ghost touch, etc. without data loss. This program works well on all iPhone models even the latest iPhone 13 mini, iPhone 13, iPhone 13 Pro Max, and is fully compatible with iOS 15.
Follow the steps below to fix iPhone not connecting to Wi-Fi without data loss:
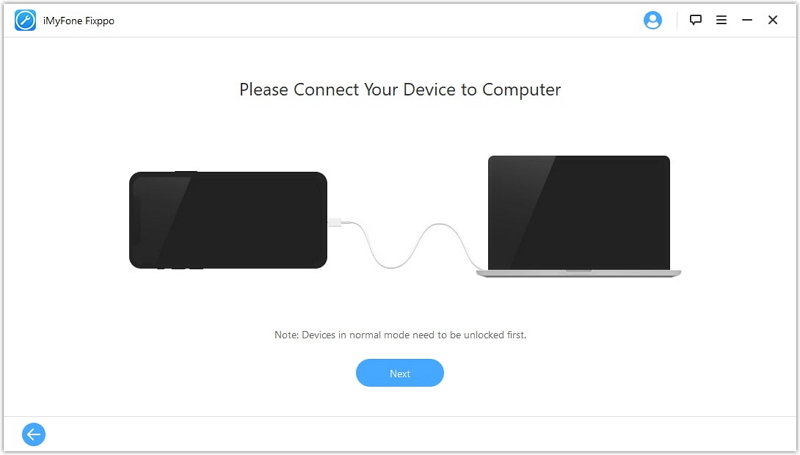
Step 1. Download and install MobePas iOS System Recovery on your computer. Launch the program and select “Standard Mode”.

Step 2. Connect your iPhone to the computer using a USB cable and click “Next”. If the software can detect your device, go ahead. If not, put your iPhone into DFU or Recovery mode.
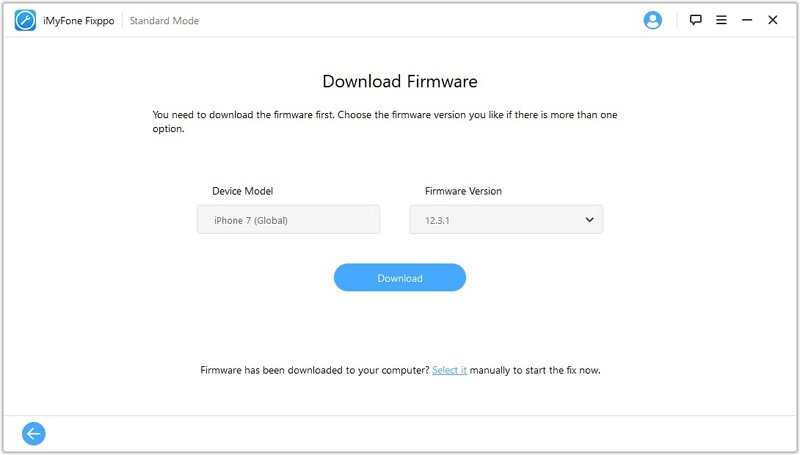
Step 3. After that, choose the right version of firmware for your iPhone and click “Download”.
Step 4. Once the download is complete, click “Start” to repair the iOS of your iPhone and fix the Wi-Fi connection problem.

Conclusion
After following the above solutions, your iPhone or iPad should be connecting to Wi-Fi again and you can continue to browse the web freely. If your iPhone still can’t connect to Wi-Fi, it may due to a hardware problem, you can take your iPhone to the nearest Apple Store for a fix.